Kitchen | Bathroom | Bedroom | Sitting Area | Piglet’s Bedroom | Electrics | Plumbing | Bulkhead | Misc | Van Build Articles


0
- No products in the cart.
VAN BUILD
This page contains all the aspects of our van build. We converted the van ourselves and whilst it was a lot of work it was absolutely worth it. We used other conversion websites, blogs and YouTube for ideas and to learn the best ways to do things so we hope these details will help you too.
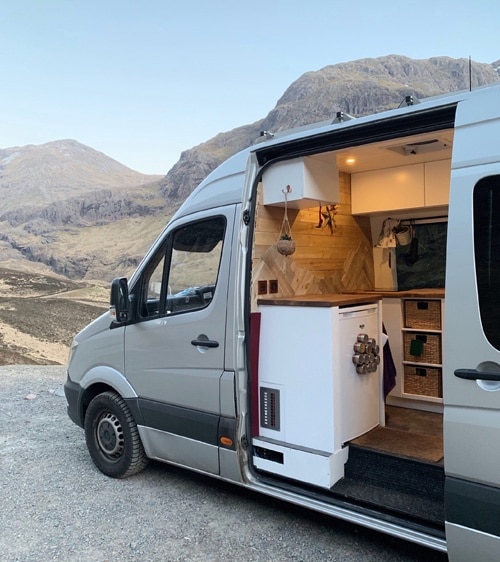
Our van is a silver 2014 Mercedes Sprinter that we bought second hand with 34,000 miles on the clock. She’s a Long Wheel Base (170”) van with a high top and standard 2WD.
KITCHEN
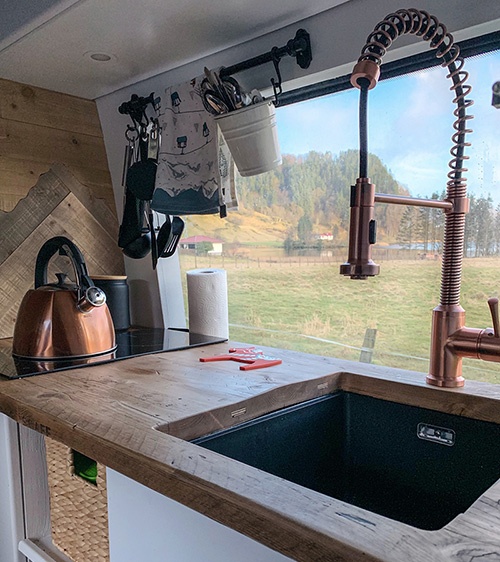
We wanted our kitchen to feel like a normal country kitchen and not a traditional campervan kitchen. Our worktops are made from recycled scaffold boards stained with natural walnut. The cupboard shells are made without 12mm plywood and the cupboard doors with 18mm mdf.
- Sink: Franke Black Undermount Sink
- Tap: Brienza Italia Faucet in Antique Copper. We’re slightly obsessed with our copper tap! It’s shipped from America so if you’re using it in the UK you’ll also need an Angle Stop Valve as the tap connections are a different size.
- Induction Hob: Cookology 30cm Induction Hob. We cook on induction as we didn’t want any gas in the van. This does mean we never cook meals that take hours as it would use too much power. Occasionally in the depths of winter we’ve had to go for a drive to top up the battery if it’s been a poor solar day. If you plan on using induction in your van build we’d recommend a lithium ion battery with a powerful inverter.
- Fridge: Bush Under Counter Fridge/Freezer. We use a standard under counter fridge as it’s so much cheaper! We decided to risk it and if it didn’t work out we’d swap it for a 12v version. A year in and so far no problems. It uses a lot less power than you’d think (it’s A+ rated) but make sure you opt for an inverter that doesn’t mind being on all the time (marine options are good).
BATHROOM
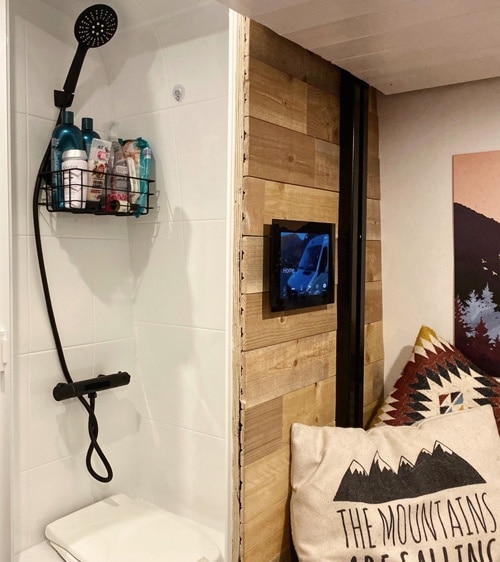
A bathroom was an essential for us in our van build. At only 76 x 56cm it’s pretty snug (and slightly smaller than we planned on) but we didn’t want to reduce the size of our kitchen any more than we had too.
- Walls: Reco Wall Panels with Tile effect
- Shower: Black Mixer and Shower
- Toilet: Separett Privy 501. We use a urine diverting toilet and decided not to do #2 in the van! Neither of us wanted to have to deal with cleaning that out! We do keep having conversations about whether to change to a composting toilet as we have found it difficult in some countries to find public toilets.
- Shower Tray: Universal Shower Tray. We used this shower tray and cut it to the size of our bathroom.
- Door: Nautilus Shower Door. This retractable shower door is a huge space saver whilst still allowing you to have a little bit of privacy (and it’s self-cleaning)!
- Toilet Roll Holder: Black Toilet Roll Holder
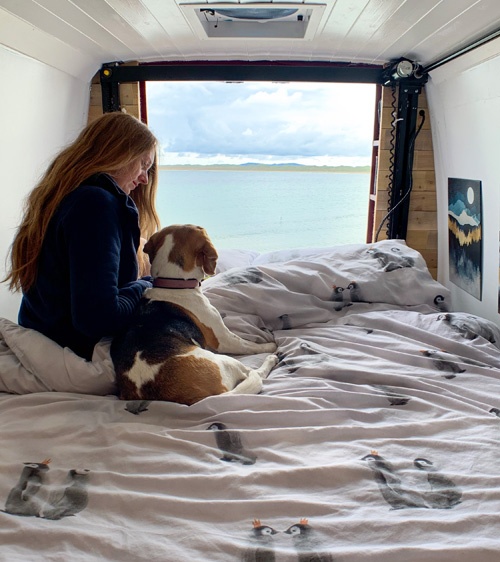
BEDROOM
Our bed is tucked away in the ceiling when not in use. This does reduce head height underneath the bed but means we’re able to have a large sitting area as well as a proper bedroom.
- Bed Lift: HappiJac Motorised Bed Lift
- Mattress: Ikea Memory Foam Mattress
- Bed Base: The Happijac does not come with a bed base so we built ours from an aluminium frame with 12mm plywood boards (with holes for ventilation).
SITTING AREA
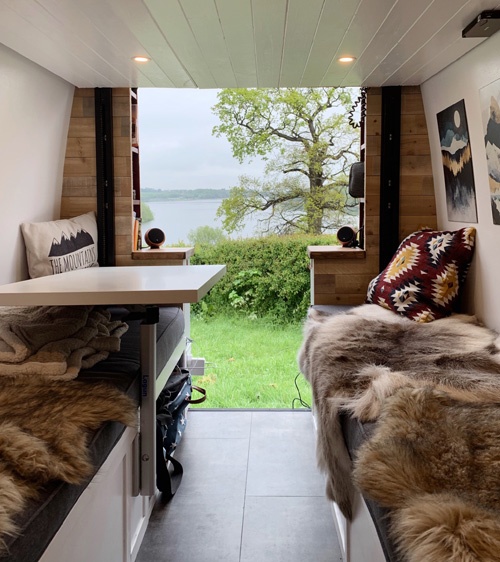
We work on the road so somewhere comfortable to work and relax was essential. We have two benches: 204cm long, 60cm wide and 44cm high. Our benches double as storage space with room for clothing, ski boots, laundry, outdoor chairs etc. Half of one of the benches contains our fresh water tank and part of the opposite bench has our battery, fuses and inverter.
- Cushions: We bought the foam for our cushions from eFoam and a local seamstress covered them for us.
- Table: Our table leg is a Lagun Table Mount. It swings in multiple directions and is really versatile. The table top is a lightweight laminated board.
- Clothing baskets: Dokehom Storage Baskets
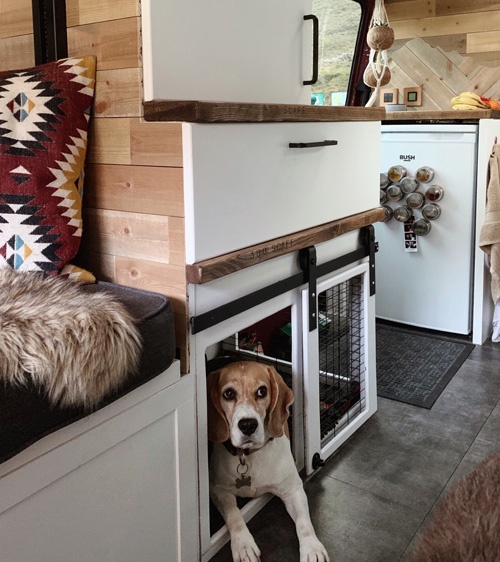
PIGLET'S BEDROOM
It was important to us when planning our van build that Piglet had her own space. We nearly turned her bedroom into more storage space but we’re definitely glad we didn’t. Not only does it give her somewhere safe to retreat to that’s all hers but we also store her coats, towels and toys in there so it stops them cluttering up the van. We wanted it to look homely so opted for a sliding barn door style finish, the main shell is constructed from plywood with large windows.
- Door: Cabinet Sliding Barn Door
- Metal Crate Panels: We bought some galvanised steel fencing panels from a garden centre, trimmed to size (ensuring no sharp edges!) and spray painted black.
- Bed: Petface Memory Foam Crate Mat. This is so comfy and the noodle cover is also great at drying her off when she’s wet and muddy!
- Toy Hammock: Bath Toy Organiser. Keeps all her toys/balls together and out of the way, and she just pulls one out when she wants to play!
ELECTRICS
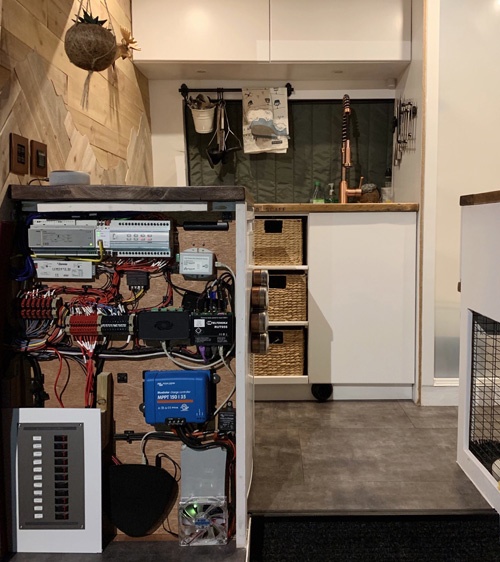
Our van has 5 x 100w solar panels mounted on a rack on our roof that feeds in to our 300AH lithium ion battery. We also use a buck boost to charge as we drive. We’ll do a separate write up on our van electrics but below is some of the main components:
- Solar Panels: 100w Solar Panel
- Solar Charge Controller: Victron SmartSolar MPPT 100/30
- Battery: Victron LiFePO4 Battery
- Inverter: Victron Multiplus 12/3000/120-16
- Battery Monitor: Victron BMV-702 Battery Monitor
- Battery Display: Victron Colour Control GX
- Shore Power Inlet: Victron Energy Power Inlet
- Buck Boost: 50A Buck-Boost DC/DC Converter
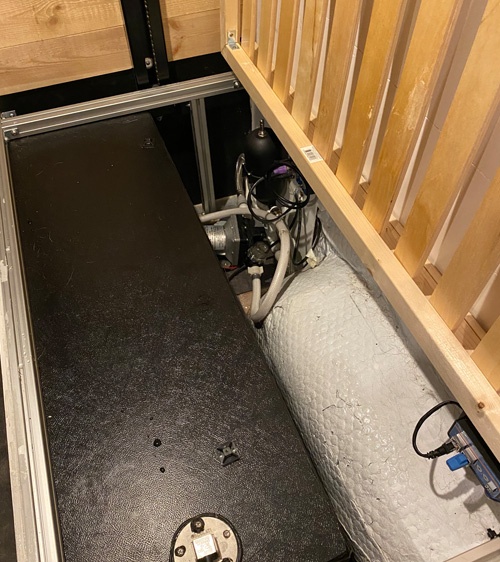
PLUMBING
Our van can carry 100 litres of fresh water and 100 litres of grey water. The fresh water tank is mounted in one of our benches to stop it freezing in the winter. We also have a 16 litre hot water tank that’s heated from our engine to provide hot water to both our kitchen sink and shower.
- Tanks: Custom sizes by Barratt Tanks
- Pump: Shurflo Revolution Pump. This pump comes on automatically when we turn the tap on, we also installed a filter and a silencer kit.
- Hot Water Tank: Isotemp Slim Square Tank 16lt
BULKHEAD
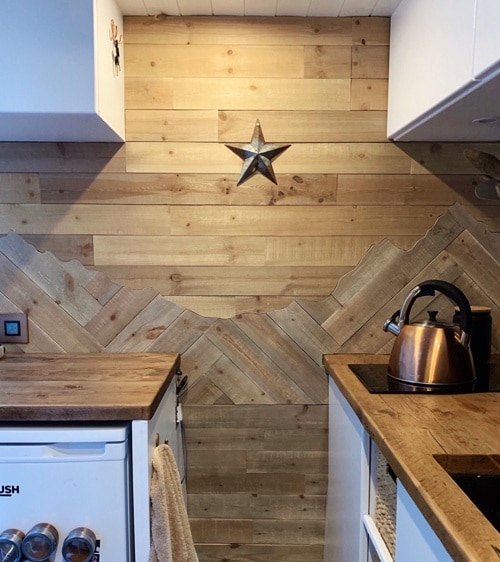
We removed our original bulk head during our van build and rebuilt it using a wooden frame filled with insulation board for temperature control. The cab side is covered in carpet lining and the living side with thin planks of wood cut with a mountain design.
- Wood: Peel and stick wood by Naturewall (please note design has changed since we purchased)
- Carpet: Van Carpet Lining with Four Way Stretch
- Lining: Closed Cell Insulation Foam
MISCELLANEOUS VAN BUILD ITEMS
Our Van Shop contains many of the smaller items we used in our build, but we’ve also listed a few things below that you might find useful.
- Lighting: 12v Dimmable LED Spotlights
- Fans: Fan-Tastic Vent with Rain Sensor
- Floor: Milliken Vinyl Flooring
- Window Coverings: Strawfoot Handmade
- Cabinet Hardware: Insma Gas Struts to keep the upper cabinets from closing
- Wardrobe: Pull Out Rail
- Projector: Yaufey Mini Projector
- Cupboard Locks: Magnetic Cupboard Locks to keep drawers and doors shut whilst driving.