

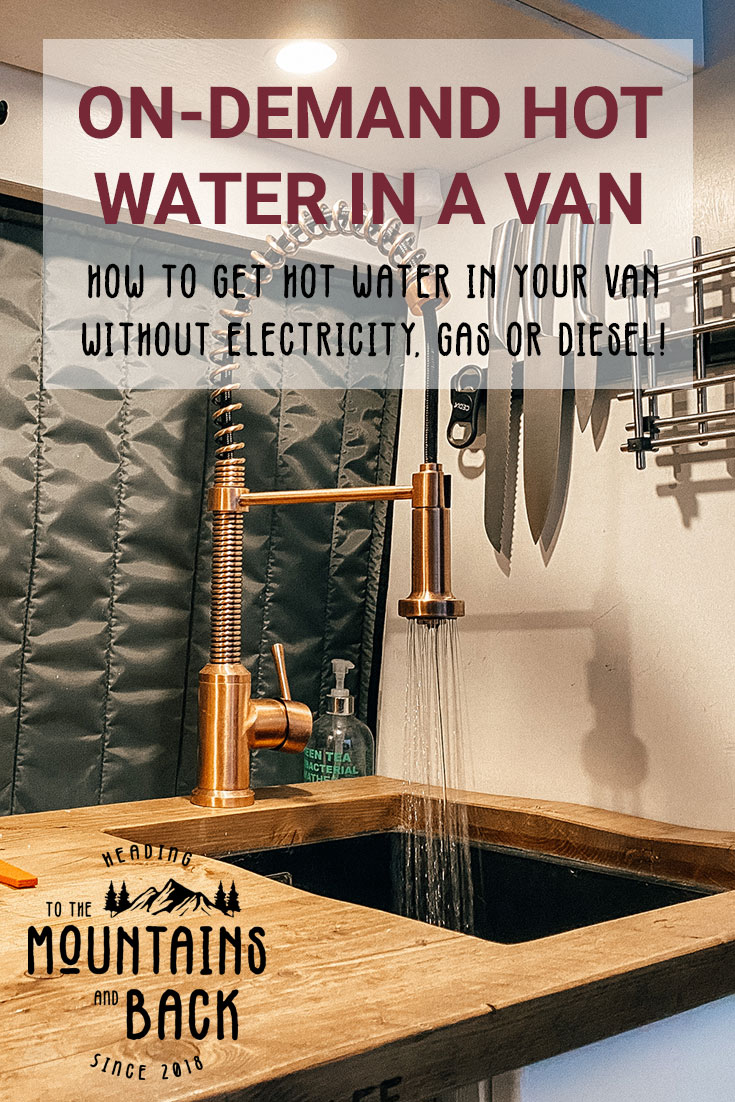
How to get Hot Water in a Van
It takes just 15 minutes of driving for us to have a full tank (16 litres) of hot water in our van! No electricity, gas or additional diesel required, and let me tell you it feels like absolute luxury!
When we first researched our van build we looked at lots of different ways to get hot water in our self-build camper. Will came across a few professional RV companies in America that used the coolant (glycol) line from the engine to heat their water. Genius!
This method uses heat generated by the engine that would otherwise go to waste. It uses a calorifier water tank and seemed like the perfect solution to us. We did a lot of research and below is what we discovered and how we went about installing hot water in our van.
Looking for information on all the different ways to get hot water in a van?
Check out our 8 Ways to Get Hot Water in a Campervan article for all the methods we found, as well as the pros and cons of each.
What is a calorifier?
A calorifier is a water heater that uses waste heat from an engine to heat up a tank of water. Calorifier tanks feature an internal heat exchange coil that’s plumbed in to the engine coolant line.
When the engine is in use it heats up. A coolant line draws this heat away from the engine, flowing through the calorifier tank and then back to the engine via the radiator. This enables a tank of water to be heated up without the use of any electricity, gas or additional diesel. It’s therefore a great off-grid solution for boats and vehicles.
Is it safe?
Our calorifier tank is part of the Isotemp range, owned by Webasto and designed for marine environments. We chose this tank as it has both an electric heating element and a calorifier heat exchange. This means if we’re connected to shore power and not driving we can use the electric heating element to get hot water.
We planned to get everything connected by a Webasto dealer at the same time they installed our diesel heater. These tanks are used a lot in camper vans, however, they’re not officially endorsed for use in vans any more.
From what we can gather concern was raised by a customer in America that the vibrations experienced by a van when being driven could cause the internal heat exchange element to crack, thereby contaminating the water. This meant none of the Webasto dealers we spoke to were prepared to install the tank as it isn’t officially endorsed by Webasto for vans.
We never managed to ascertain if this had ever actually happened. We concluded vibrations must also be present on a boat, so we decided the pay-off was worth the risk. So far, we have had no issues and it’s been installed for over two years.

Will it damage my engine?
The other question we came across online was concern over whether it would draw too much heat way from the engine and thereby shorten the life of the engine. Our engine is already under significant strain as we are always on the upper end of the payload. We also drive in snow, grit, onto beaches and up mountains so we definitely put it to the test!
Essentially, there are many reasons our engine might not last as long as a standard Sprinter van’s might! Again, we decided the pay-off of having on-demand hot water in our van was worth the risk, especially considering how many other stresses could cause our engine to fail prematurely. We have, however, fully insulated all the pipework to mitigate against heat loss.
So far our engine runs at the same temperature it always did. It get’s hot very quickly and there doesn’t seem to be any evidence the engine is struggling, so we’re not too worried!
Heating water with electricity
The last few weeks of our van build were pretty hectic! In the end, we were unable to find someone to fit the system for us and ran out of time. We therefore set off on our first winter adventure to Norway (via Austria, Germany, the Netherlands and Denmark!) relying on our fall back plan; electricity.
We installed our hot water tank early on in our build (behind the kitchen cupboards). This tank critically features both an electric heating element and an internal heat exchange coil that can connect to an engine coolant line. Initially, for our first 6 months we only connected the electric option.
Using electricity to heat a tank of water uses a lot of power. We charge our battery as we drive but to heat a tank of water usually takes around 2 hours driving! If you start with a battery not at 100% charge that requires topping up as well it can mean you need to drive for 3-4 hours to generate enough power. This is especially true in winter when there’s not much solar to top up your battery in the background.
We managed like this for 6 months so it can’t have been that bad! Although, we did drive all the way to the top of Norway and back so were driving most days. We also only heated the tank if we wanted to shower, saving showers for when we knew we’d be travelling. Dishes were done using the trusty boiling water in a pan method! Occasionally we got lucky and found somewhere with free/cheap power and always took advantage of on-demand hot water then!
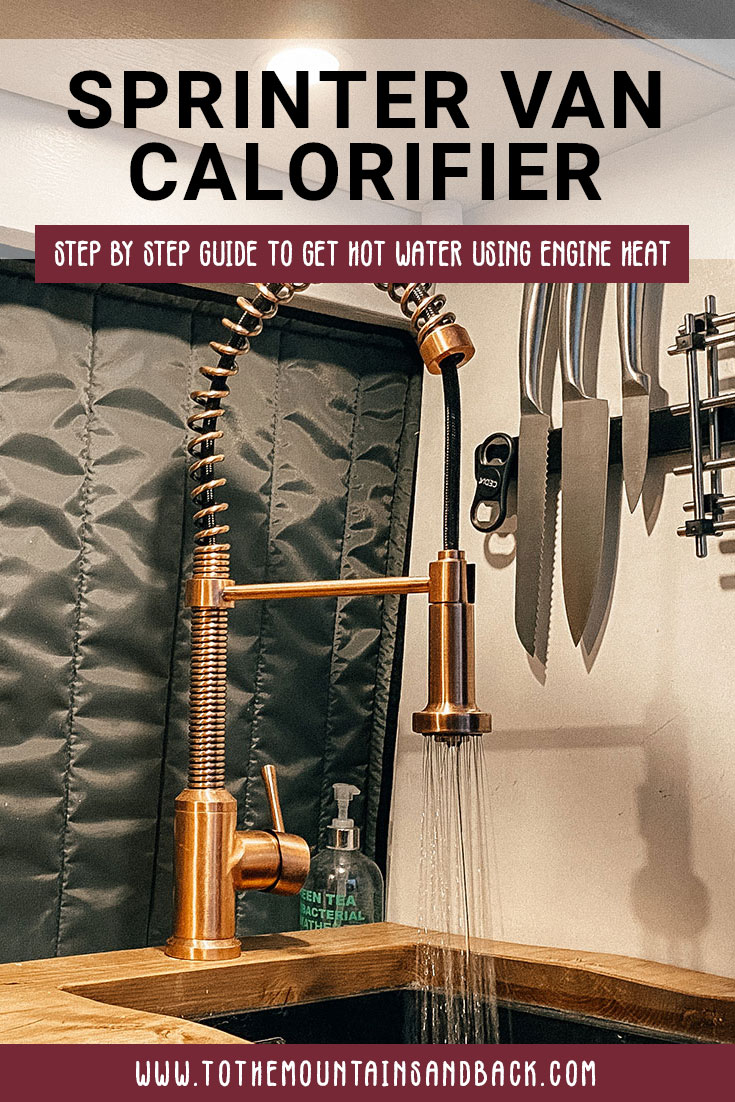
Using engine heat to get hot water in a van
We eventually got round to connecting our coolant line to our hot water system and we’re so pleased we did! Our local mechanic installed the hose whilst the van was in for a service, and it was actually a really simple process.
It’s so nice to have the luxury of just running the tap to wash your hands with warm water or to do the dishes. And, whilst we don’t shower daily (that would use far too much of our precious fresh water) it’s really good to have the option!

Installation Process
1. Install Water Tank
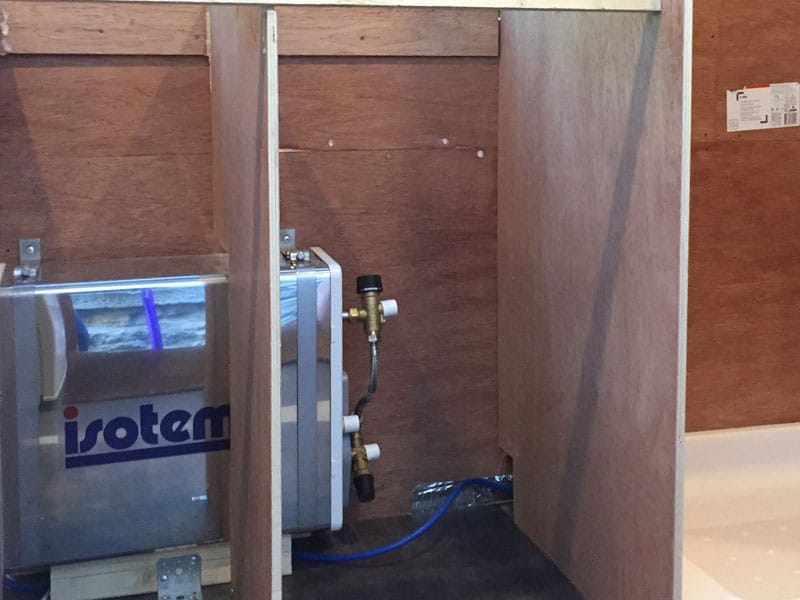
- We opted for a 16lt water tank that’s often installed in boats. It’s an Isotemp Slim Square Tank that enables us to heat water via electricity if we have hook up or using our engine heat.
- Get your tank as close to your engine as you can to keep your pipe lengths shorter. We put ours behind our kitchen cupboards, just on the other side of the bulkhead.
2. Install Hose
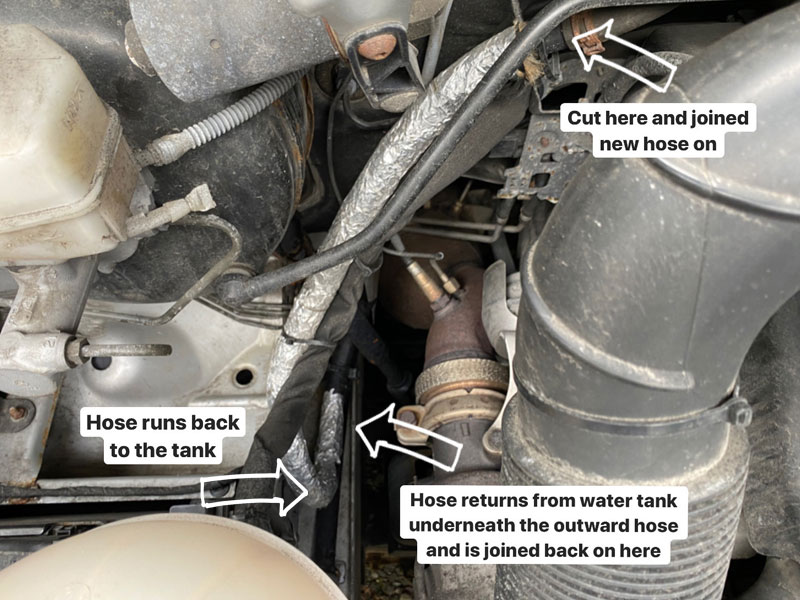
- Cut into the coolant (glycol) line and use a pipe joiner to connect your new flexible hose that will link to your tank. Run this hose to the tank and then back to the engine.
- Join it back to the original coolant line where it was cut, allowing it to continue on its loop.
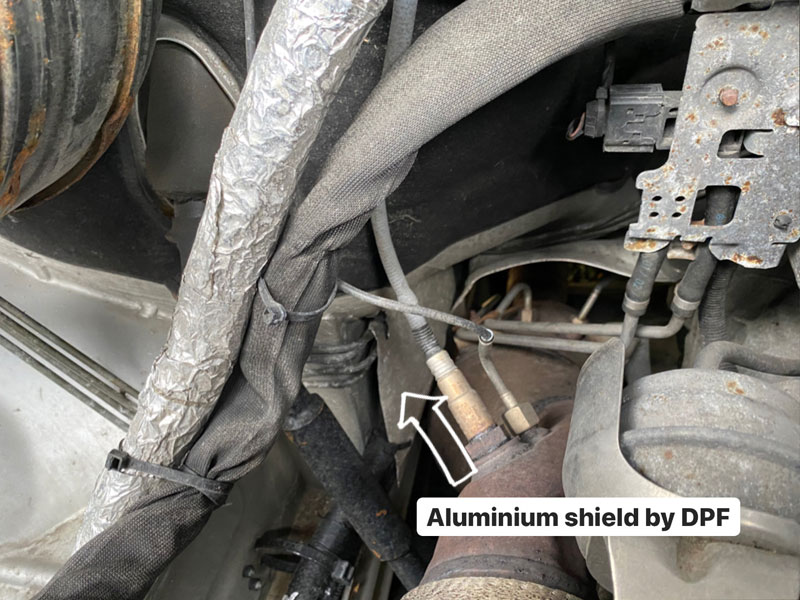
- The route we took to get the hose to our water tank came close to the Diesel Particulate Filter (DPF), we therefore fitted some aluminium as a heat shield to protect the new pipework from the heat of the DPF.
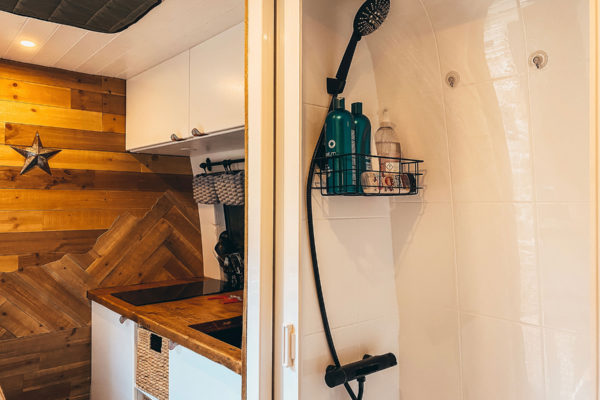
- Don’t forget to run a pipe from the dump valve. This automatically releases water from the tank to relieve pressure once the water is hot. We ran ours through to our shower and it discretely drains into our shower tray.
3. Top Up Coolant
- You now have a much longer coolant line than before so will need to top up your engine coolant to account for this.
- Run the engine to get rid of any air and then check your coolant level again. Make sure if you need to top up again that you wait for it to cool and de-pressurise.
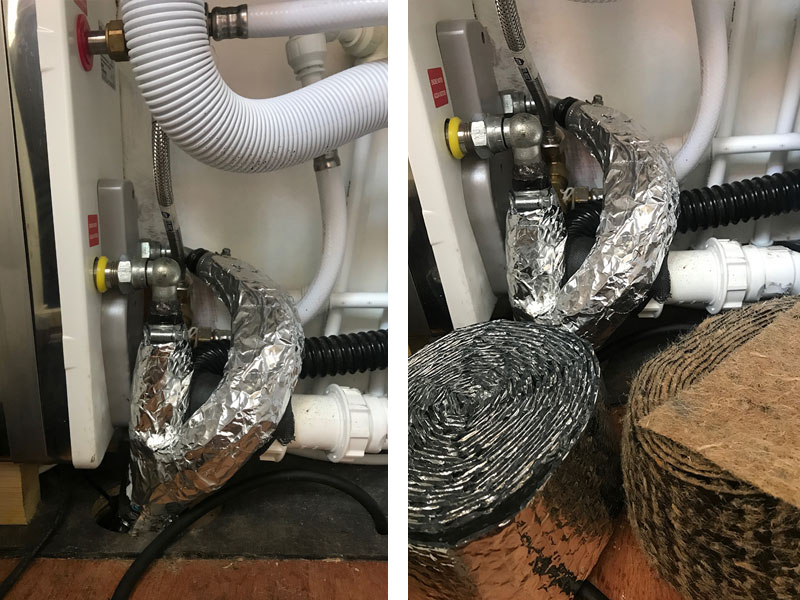
4. Insulate External Hose
- We insulated all the hose running to and from our water tank using pipe lagging and foil bubble wrap. This was both to protect the pipe work and ensure minimal heat loss.
5. Insulate Internally
- Our tank is insulated but still gets warm, and the pipes running into it are too hot to touch.
- Insulate the tank and pipes as much as you can for two reasons: Firstly it stops anything near the tank getting too warm (in our case food in the cupboards!); Secondly, the whole systems acts like a radiator giving off heat. Great in the winter but not so good if you’re in 30°c heat in summer and trying to keep your van as cool as possible.
6. Be Careful!
- The water gets very hot! The coolant line runs at around 90°c so make sure you temper the water coming out of your tank. It does mean your hot water will last longer though as you’ll be mixing a fair bit of cold with it to make it bearable to use!
That’s the basics of our van hot water system and its installation. If you have any questions or want more detail on something just drop it in the comments below or send us message. We love the fact that as soon as our engine gets hot we’re heating water as a by-product. We would definitely not hesitate to do it again.
If you’ve found this post useful and would like to support our content you can do so by clicking our Amazon UK or Amazon US links before your next purchase from Amazon (we’ll earn a small commission but it won’t cost you any more), or by treating us to a virtual coffee!
This page contains affiliate links. We make a small commission on purchases made through these links at no extra cost to yourselves.
Like this post? Pin it!


Hi, once you’ve stopped driving, how long does the tank stay hot? Or does it need to be used relatively quickly after parking? Thanks!
No, it stays hot for quite a long time. If it’s winter and very cold outside it will have gone lukewarm by the morning but in summer it’s still hot the next day sometimes. If you use some of it the cold water added to the tank then dilutes it a little so it’s colder but if you park up at lunchtime and don’t use any it will still be hot in the evening, and maybe the morning in summer. Hope that helps!
Thank you this was helpful article. Can you explain how you connected the pipes from your kitchen sink to your shower? This set up may be easier for you since it seems as though your shower and kitchen are on the same side of the van. My set up makes this difficult as the shower and kitchen are directly across from one another on opposite sides. Do you have any suggestions?
We have flexible pipes coming from both our fresh water tank and hot water tank that t-off to our sink and shower separately. Most of our pipework is in the cupboard beneath out sink. In your case I would imagine the best thing to do is run the pipes beneath the floor but it also depends where your tanks are located too.
Hi, how much did it cost to install this heating method?
We installed it back in 2018 so I imagine the costs will have increased since. We purchased the hot water tank and plumbed it all in ourself. Our local mechanic then connected the coolant line but I’m afraid I can’t remember what he charged us.
Hi, can you use this system and also have the tank connected to the electrics at the same time, so that you can use the mains when you’re parked and hooked up?
Yes, the tank has both options, you can switch to using the electric heating element if you have lots of solar or are using shore power.
Thanks for the great article.
What is your real life experience with the quantity of hot water? Is it to much? to little? Love to hear your about your experience.
There are smaller 10L calorifier available on the market, and therefor trying decide between 10 or 16L.
Some campers hot water thanks go as low a 6L. I guess the main question about a larger tanks, is the electricity needed to heat it if ever needed. However, more water should also stay warmer for longer.
Thanks ^^
I guess it depends how many of you there are in the van. For us it’s enough hot water to wash the dishes and both shower comfortably. I don’t think we’d want to go for a smaller tank BUT it does mean if you just drive for a few minutes from one spot to the next the water doesn’t get hot enough as there’s more water to heat through. You need to drive for at least 15 minutes (or more depending on how warm the engine gets). If you’re happy having shorter showers or there’s just one of you I’m sure a slightly smaller tank would be fine.
Electricity wise it does draw quite a bit of power but we now only use electricity to heat it if we’re on shore power and electricity is included (not charged per kw). It’s really useful to have this option if we are parked at a campsite or similar for a few days.
Hope that helps!